Updated; January 09, 2026
Applicable Role: All managers
Prerequisites:
- WAVE Interactive account
- Credit balance
- Permission to edit user details (If you believe you should have the permission, please reach out to support HERE)
Step-by-step guide:
For New User:
1. From the Dashboard, under the "Manager Users" section, click "Users List" drop down, then click "Create New User".

2. Populate the required fields and set an Auto-Suspend Date. Be sure to leave the Suspended field as No.

3. Hit Save to save this user and their Auto-Suspend date.
Note: The user will be suspended at 12:00:01 am on this date.
For an Existing User:
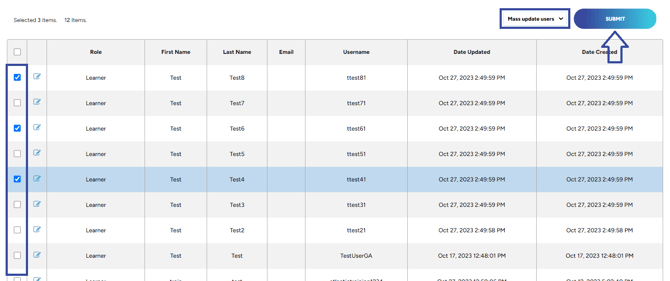
1. From the Dashboard under "Manage Users", Click "Users List" drop-down, then click "List".

2. Next, select the users you would like to set an auto-suspension date for by clicking the check box to the left of their name. Then change the drop-down menu in the top right corner to Mass Update Users and click Submit.
3. Select the box next to Auto Suspend Date, and select the desired Suspend Date.
The user(s) will be suspended at 12:00:01 am on this date.

"If you need further assistance after reading this article, please submit a ticket HERE and someone from our team will assist you soon!"