Adding Safety Data Sheets into WAVE
With our upload feature you will be able to add all of your SDS's and create a custom course for your Learners to view.
Uploading a SDS:
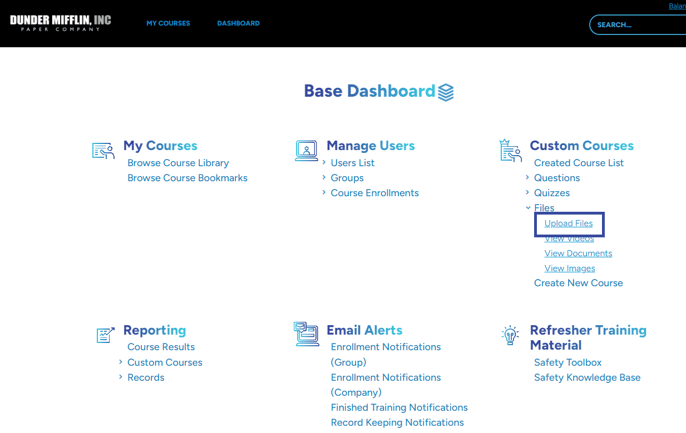
From your "Dashboard" you will want to navigate to the "Custom Courses" section and click on the "Upload Files" link.
From here you can click on the "upload" button in the upper left to upload your file.
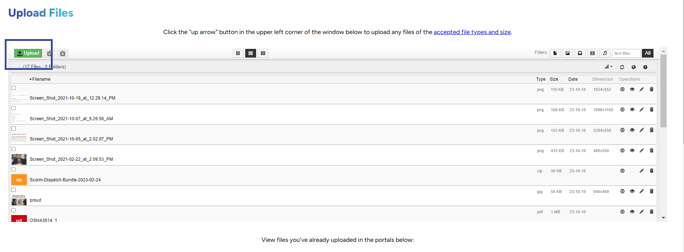
A box will open up where you can drag & drop your SDS's into WAVE.
*Make sure when you are done uploading your files to click the "Return to files list" button at the top.
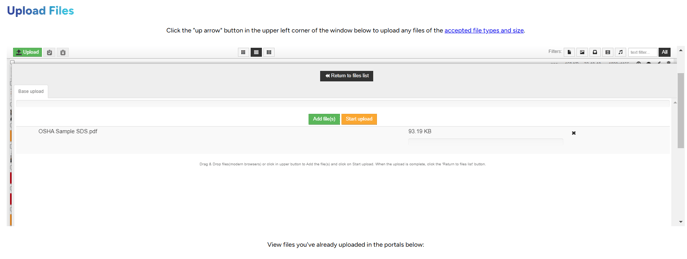
You should now be able to see your SDS's inside the file window.
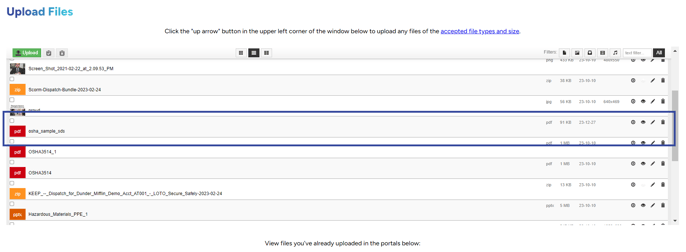
Once you have all of your SDS's added to WAVE we can create a custom course for your learners. Creating a custom course for your SDS's will make them accessible to all of your learners and you will be able to track what SDS's are being used most!
Creating a custom course:
Once all of your SDS's are uploaded into WAVE we can create a custom course so that all members of your company can view them.
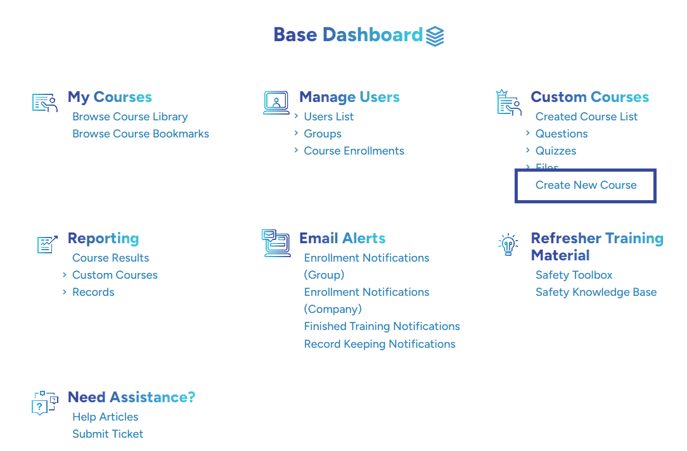
From the "Dashboard" we can navigate to the "Custom Courses" section and click the link "Create New Course"
Here we will set up the course.
Course Type: WAVE Course
SKU: Can be whatever you would like to set but in this tutorial, we are going with "SDS"
Name: Can be whatever you would like to set but in this tutorial, we are going with "Safety Data Sheets"
Course Visibility: Visible
The rest of the inputs are optional but feel free to add anything you would like!
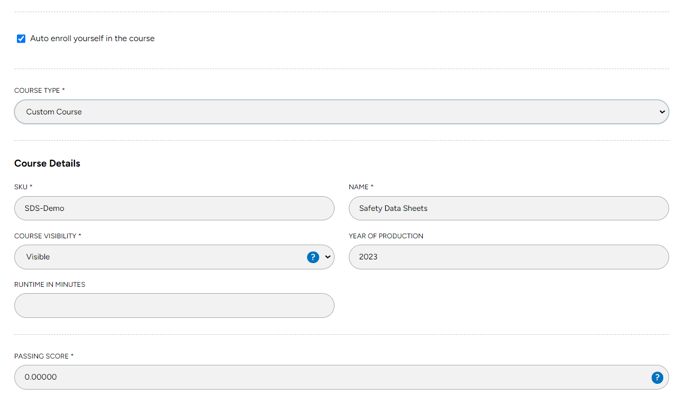
When you are done adding the information make sure to click "SAVE & CONTINUE EDIT".
Once the "Custom Course" is saved we will want to navigate to the "Sections" tab.
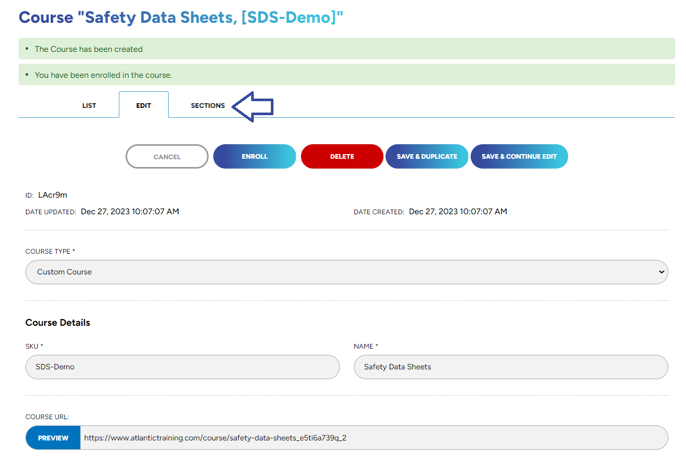
We will click on the green "Create Course Sections" button. From here we will fill in all our information for our course.
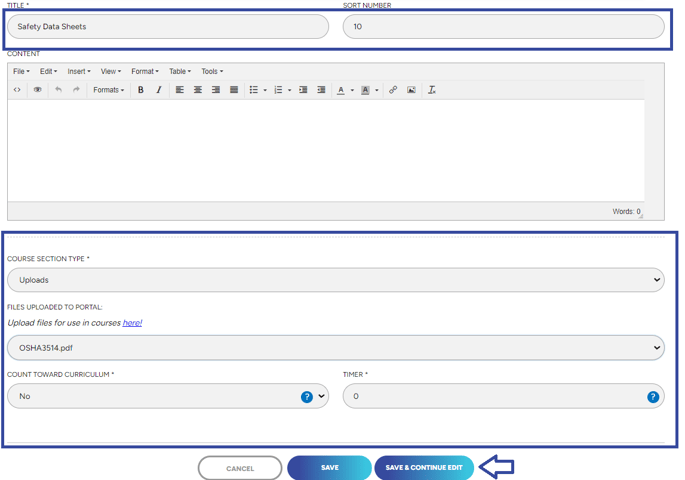
Title: Whatever you would like to set, in this tutorial we will be using "Safety Data Sheets"
Sort Number: A sort number is like a chapter in a book. We recommend using "10" to start out with.
Course Section Type: Uploads
File: Make sure to grab the SDS we uploaded in the previous section
Count Toward Curriculum: You can set this to count towards the overall course score if you would like
Timer: A time will force a user to stay on that page for as long as you have set it for.
*The Time for the "Timer" is measured in seconds.
Make sure to hit "SAVE" when you're done!
*If you would like to add some questions after a SDS you can follow this guide HERE or watch our video tutorial HERE
Using this process you will be able to create as many sections as you have SDS. Once you have created all the sections you would like we can then enroll the course to all of our Learners.
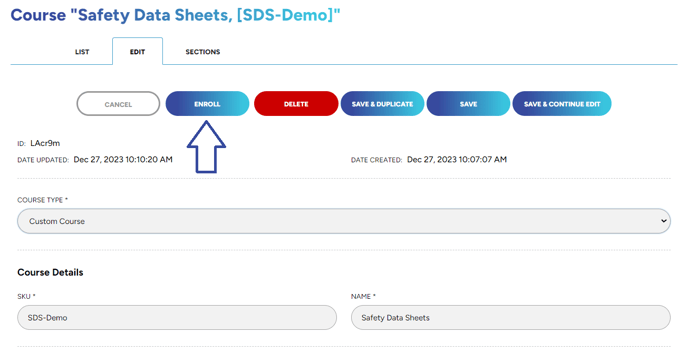
To enroll our Learners we will want to navigate back to the "Edit" tab.

You will see an "ENROLL" button at the top. Click on the "ENROLL" button.
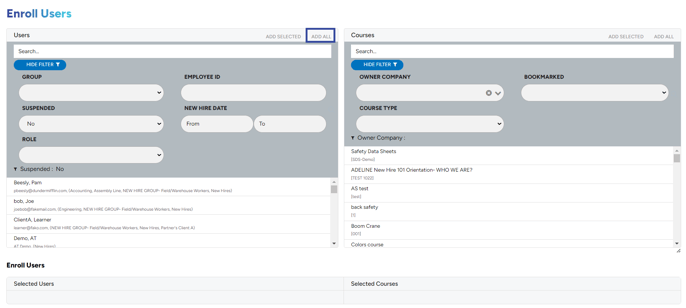
From here we can enroll all the "Users" we would like to view the SDS's. The course should already be pre-chosen for you. You can either click the "Add All" button to add all of your active users or you can select which users you would like to be enrolled in the course.
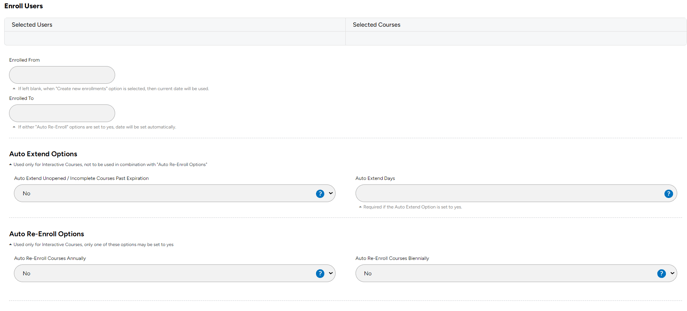
Once you have your "Users" selected you can set up the "Enrolled From/ Enrolled To" dates, the "Auto Extend Options", the "Auto Re-Enroll Options", and finally the Enrollment and/or Registration options.
*"Create new Enrollments" under the "Enrollment Options" must be checked to create the enrollment.

Click the "Review" button then select "Enroll".
All of the "Users" you have selected will now be able to view any SDS's you have uploaded!
"If you need further assistance after reading this article, please submit a ticket HERE and someone from our team will assist you soon! If you would like to schedule a Tech Support meeting please book a meeting HERE."
Related Links:
Need to know how to create a quiz inside WAVE? Check out this article HERE!
Want to create a record inside WAVE? Check out this article HERE!
Need to export your course results? Check out this article HERE!